Wednesday, April 30, 2008
The bad idea of a gas tax holiday
Tom Friedman points out the obvious stupidity of McCain's and Clinton's idea of a gas tax holiday for the summer.
Sunday, April 27, 2008
Broke the camera
In my attempt to remove the prominent vignetting which restricts the scanned area to 5x8 inches, I broke the camera. This was to be expected, as it has happened every time I try to do it (or at least soon thereafter). I can only hope the problem is a physical gearing issue, which means I might be able to fix it. And I hope it does, as I'd love to take it out west and south and other places...
Wednesday, April 23, 2008
Rockefeller Chapel, Reynolds Club, and Flowers
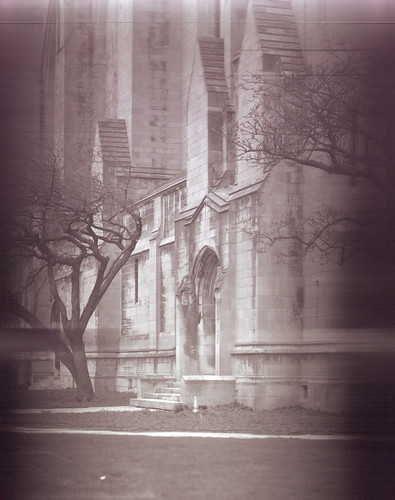
The light was rapidly falling last evening and this was my last image, with a full open aperture, but it was still underexposed by about a stop. Expressed in other terms, a film camera with 100ASA film would expose for this for about one second at f/8. Autoleveled and hue adjusted in photoshop. See the original here. This also was the first outing of the camera with a coat of black paint in the interior, an additional baffle on the top to handle light when doing macro work, and I added a shoulder strap with some eyelets (one broke on the trip). Remind me to stick some teflon strips or wax the bottom of the inner box--it's getting too hard to move to focus.

A color image, underexposed. The lightest of breezes moved the daffodils a touch between exposures. The flowers were just over 4 feet away.

Tuesday, April 22, 2008
CF Torchiere replacement
Compact Fluorescents are all hot right now. And it's Earth Week.
I bought a floor lamp from Home Depot that used a single standard bulb and didn't have any fancy dimmer system: it just had a hi/lo switch (I'm still not sure what it does with it--the CFLs flicker on the low setting, so I quickly turn the lamp to high when flipping the switch. It could be a simple rectifier to provide 50% of the power). I then bought three lamp socket splitters. These screw into a standard lamp socket and provide two sockets. So, with three splitters, a single socket becomes four. This is OK because the CFLs use so much less power--with four of them, I'm only using 100W, and the floor lamp suggests using a 150W standard bulb. The sockets themselves are rated higher, so I think the 150W max is for thermal/fire issues (high wattage bulbs can start fires if drapery or other flammables fall on them).
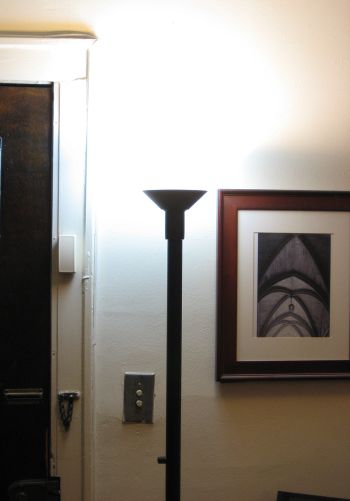
Taking pictures of lighting fixtures is hard--either the fixture looks dim and the room dark, or the fixture is overexposed.
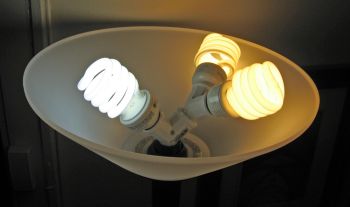
If you think the color temperature is off, you can adjust by using different color CF bulbs. Here was an experiment with a 2:1 warm:daylight ratio.
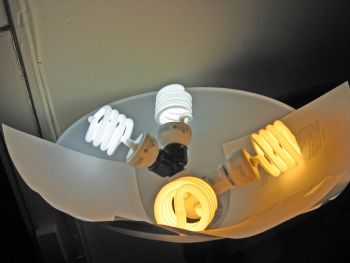
an even ratio between warm and daylight. This was too cool for evening use. The color is way exaggerated here--the yellow bulbs are nearly white to the eye.
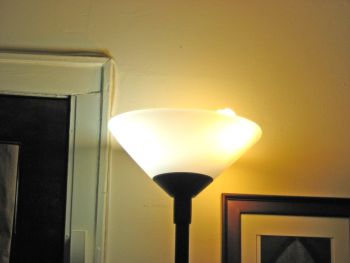
The color of the photographs is too strong--your eye does not see such strong color in the fixture.
In any case, I made this fixture 100% n:vision 100W soft white bulbs, and use it all the time. I have a second fixture where I replaced the dimmer switch with a standard push switch (it's tough to find a switch that fits in small diameter torchieres) so I could use compact fluorescents in it. I put 3 GE 100W daylight bulbs in the latter fixture and use it only during the day.
Now the caveat: the splitters stick the bulbs higher than where an incandescent would be in the fixture. Ideally the rim of the lamp shade would be a touch higher, but I've yet experimented with the right material to make one. Doing so would improve the fixture and reduce glare from it.
The end result is I've increased the lighting in my otherwise dark apartment (north facing windows on the first floor) and decreased my lighting energy usage by 50%, even more on average since I don't use the second fixture at night. I'm already being paid back on my electricity bill: some $10 a month less.
I bought a floor lamp from Home Depot that used a single standard bulb and didn't have any fancy dimmer system: it just had a hi/lo switch (I'm still not sure what it does with it--the CFLs flicker on the low setting, so I quickly turn the lamp to high when flipping the switch. It could be a simple rectifier to provide 50% of the power). I then bought three lamp socket splitters. These screw into a standard lamp socket and provide two sockets. So, with three splitters, a single socket becomes four. This is OK because the CFLs use so much less power--with four of them, I'm only using 100W, and the floor lamp suggests using a 150W standard bulb. The sockets themselves are rated higher, so I think the 150W max is for thermal/fire issues (high wattage bulbs can start fires if drapery or other flammables fall on them).

Taking pictures of lighting fixtures is hard--either the fixture looks dim and the room dark, or the fixture is overexposed.

If you think the color temperature is off, you can adjust by using different color CF bulbs. Here was an experiment with a 2:1 warm:daylight ratio.

an even ratio between warm and daylight. This was too cool for evening use. The color is way exaggerated here--the yellow bulbs are nearly white to the eye.

The color of the photographs is too strong--your eye does not see such strong color in the fixture.
In any case, I made this fixture 100% n:vision 100W soft white bulbs, and use it all the time. I have a second fixture where I replaced the dimmer switch with a standard push switch (it's tough to find a switch that fits in small diameter torchieres) so I could use compact fluorescents in it. I put 3 GE 100W daylight bulbs in the latter fixture and use it only during the day.
Now the caveat: the splitters stick the bulbs higher than where an incandescent would be in the fixture. Ideally the rim of the lamp shade would be a touch higher, but I've yet experimented with the right material to make one. Doing so would improve the fixture and reduce glare from it.
The end result is I've increased the lighting in my otherwise dark apartment (north facing windows on the first floor) and decreased my lighting energy usage by 50%, even more on average since I don't use the second fixture at night. I'm already being paid back on my electricity bill: some $10 a month less.
Weather on campus
The Ryerson Astronomical Society got SG funding for a weather station on campus, to get accurate weather data (which is really important in the spring with lake breezes freezing the lakefront while Midway is warm). We finally overcame all obstacles last night and have the station live at http://sagan.uchicago.edu/. I believe we have other delivery vectors to set up, so it can be seen at the Reynold's Club TV screen and such.
Friday, April 18, 2008
Adventures in Large Format Digital Photography: part 4
Today I mounted an inexpensive IR blocking filter in front of the lens using a cardboard mount. It's ugly, but gets the job done. I did this because after a second outing with the camera the odd tones on vegetation and clothing were getting tiring. It also allows me to make real color images with three separate red green blue scans.
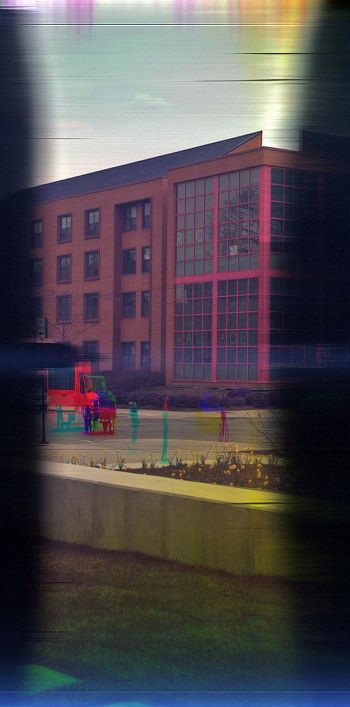
Three separate scans using a 25A red, 47 blue, and a combo X1+Y2 greenish filters. Added together in photoshop and auto-leveled, plus some addition saturation, and some highlight/shadow work.
The green is not a true tricolor green, it's more yellowish. I need to buy the 61 green to get better matching.
Sunday, April 13, 2008
Red Shirt Phenomenon
A great way to drive traffic to a site about web site statistics. Don't miss the powerpoint slides.
Analytics according to Captain Kirk
seen via B12 Solipsism
Analytics according to Captain Kirk
...One of my favorites is an analysis of the Red-Shirt Phenomenon in Star Trek.
What? You don't know about the Red Shirt Phenomenon? Well, as any die-hard Trekkie knows, if you are wearing a red shirt and beam to the planet with Captain Kirk, you're gonna die. That's the common thinking, but I decided to put this to the test. After all, I hadn't seen any definitive proof; it's just what people said. (Remind you of your current web analytics strategy?) So, let's set our phasers on 'stun' and see what we find...
seen via B12 Solipsism
Friday, April 11, 2008
Adventures in Large Format Digital Scanning: Part 3
Click to enlarge any of these to the original size (the first image is actually only 50%).
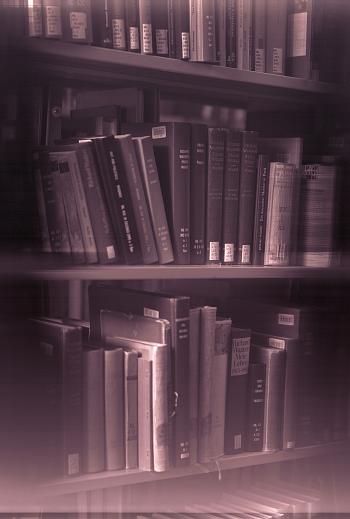
An early image with the prototype cardboard camera. This image was auto-leveled, sharpened, and hue altered to attempt to match the original color out of the camera.
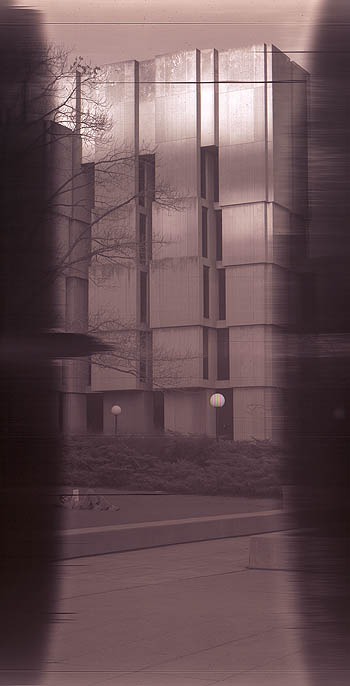
When outdoors with a small aperture all the dust on the scanner glass becomes visible, as seen in this and all further images in this post. I ended up cleaning it after this first trip outdoors.
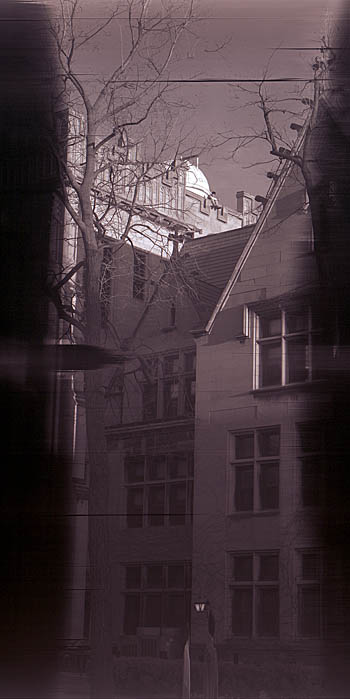
You can heavily sharpen the images out of the camera: this one is at 169%. I am still experimenting with basic things like focusing and apertures, so final sharpening levels are way in the future.
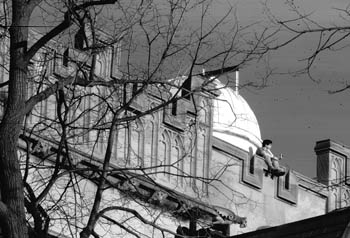
I made a second scan of Lui at 1200dpi, cropped, and cropped some more in post-processing. It looks soft on the original and I think 1200dpi might be interpolated (although Canon says 1200x2400dpi). It's also possible the focus was off.

An early image with the prototype cardboard camera. This image was auto-leveled, sharpened, and hue altered to attempt to match the original color out of the camera.

When outdoors with a small aperture all the dust on the scanner glass becomes visible, as seen in this and all further images in this post. I ended up cleaning it after this first trip outdoors.

You can heavily sharpen the images out of the camera: this one is at 169%. I am still experimenting with basic things like focusing and apertures, so final sharpening levels are way in the future.

I made a second scan of Lui at 1200dpi, cropped, and cropped some more in post-processing. It looks soft on the original and I think 1200dpi might be interpolated (although Canon says 1200x2400dpi). It's also possible the focus was off.
The new cheap subnotebook race
More gadget blogs need this sort of writing. We are using several Eee PCs here as dumb terminals for various headless servers and they work great. In some cases they replaced 15 year old Toshiba laptops that until now had no modern replacements.
Boing Boing Gadgets: Dell Joins Asus, HP In "Race To The Bottom" with Budget Sub-Notebook
A few months ago, a Sony executive, asked what he thought of the success of the Asus Eee bargain sub-notebook, leaned back in his chair, sucked on his cigar and smugly denounced the pursuit of cute, tiny, low-cost laptops as "a race to the bottom." Then, turning dangerous, he leapt like a panther across the desk, tackled his inquisitor and plunged the smoldering ember of his cigar through the vitreous of his interviewer's eye.
Boing Boing Gadgets: Dell Joins Asus, HP In "Race To The Bottom" with Budget Sub-Notebook
Wednesday, April 09, 2008
Adventures in Large Format Digital Scanning: part 2
Some photos of the current iteration of the large format scanner camera. I built this over the past month after getting out of the mark I cardboard prototype phase.

The front of the camera holds a 8x10 format lens. It's mounted in a ring that attaches to a wooden inbox. The lens is a "Rapid Rectilinear", a symmetrical lens with four lenses in two groups around a stop. The lens type was invented in 1866 and was the predominant lens for about 50 years. My particular model lacks an iris and instead you insert thin metal sheets called Waterhouse stops into a slot on the lens to select an aperture. For the moment, I make the stops out of ordinary playing cards.
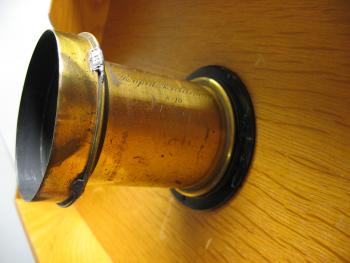
Both the lens and lens mounting ring were bought on Ebay.
The camera is a sliding box camera: two boxes, one slightly smaller than the other, are slid to focus the camera. Major portions of the boxes are made out of 1/2-inch plywood. The front and back of the camera are black foam-core board. I used some weatherstripping to block light in between the inner and outer box. Thanks to Tod Olson for the plywood and cutting help.
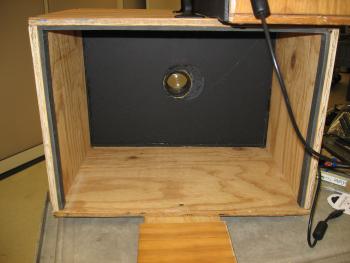
The Canon scanner sits at the back of the camera. The inside of the camera near the scanner is covered in self-adhesive black flocking paper from Protostar. Some additional foam-core board makes a light shield in front of this box when focusing close objects.
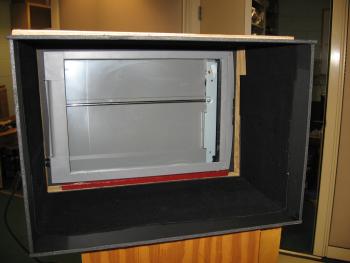
The large box and the front lens board are mounted on a 1" x 5" board, cut to about 24". A 1/4 x 20 tripod bushing is glued into a slightly depressed cut underneath. A small piece of 1/2-inch plywood at the back supports the inner box when focusing on close objects. The focusing range is from infinity to just under 4ft.
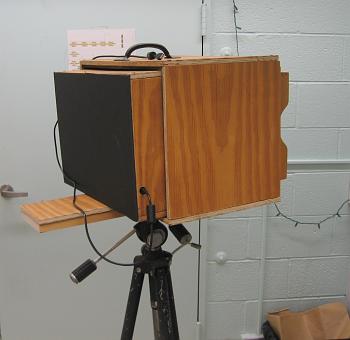
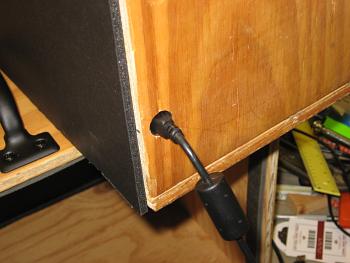
The scanner is powered via the USB connection.
Here's an image out of the camera. I turned it on its side to get a better view of Harper. The only thing I did was sharpen it a touch: it can be sharpened much more. The vignetting is optical in the scanner and requires some additional surgery to the scanner before it allows me to scan the entire 8.5" x 11.7" area. This particular image I scanned at 300dpi.
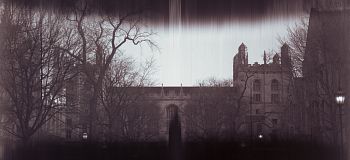
To view the image unaltered out of the camera, click here. It's 2532x1155.

The front of the camera holds a 8x10 format lens. It's mounted in a ring that attaches to a wooden inbox. The lens is a "Rapid Rectilinear", a symmetrical lens with four lenses in two groups around a stop. The lens type was invented in 1866 and was the predominant lens for about 50 years. My particular model lacks an iris and instead you insert thin metal sheets called Waterhouse stops into a slot on the lens to select an aperture. For the moment, I make the stops out of ordinary playing cards.

Both the lens and lens mounting ring were bought on Ebay.
The camera is a sliding box camera: two boxes, one slightly smaller than the other, are slid to focus the camera. Major portions of the boxes are made out of 1/2-inch plywood. The front and back of the camera are black foam-core board. I used some weatherstripping to block light in between the inner and outer box. Thanks to Tod Olson for the plywood and cutting help.

The Canon scanner sits at the back of the camera. The inside of the camera near the scanner is covered in self-adhesive black flocking paper from Protostar. Some additional foam-core board makes a light shield in front of this box when focusing close objects.

The large box and the front lens board are mounted on a 1" x 5" board, cut to about 24". A 1/4 x 20 tripod bushing is glued into a slightly depressed cut underneath. A small piece of 1/2-inch plywood at the back supports the inner box when focusing on close objects. The focusing range is from infinity to just under 4ft.

The scanner is powered via the USB connection.

Here's an image out of the camera. I turned it on its side to get a better view of Harper. The only thing I did was sharpen it a touch: it can be sharpened much more. The vignetting is optical in the scanner and requires some additional surgery to the scanner before it allows me to scan the entire 8.5" x 11.7" area. This particular image I scanned at 300dpi.

To view the image unaltered out of the camera, click here. It's 2532x1155.
Tuesday, April 08, 2008
Re: Energy Lost
Just yesterday after pointing out the post about wasted energy in Treehugger they bring up one of the solutions to the energy problem: using the waste heat from power plants.
Monday, April 07, 2008
The law applies to everyone
And when we fail to prosecute crimes by "special people", everyone loses. Elected officials deserve the highest scrutiny. Those entrusted with enforcing the law must, must, be held to the same standards they judge others.
Special license plates shield officials from traffic tickets
Special license plates shield officials from traffic tickets
Energy lost
Treehugger picked up on the great New York Times graphs of energy lost in different sectors of the US. And they also remembered the great DOE flowchart of energy through from production to use. That flowchart is fantastic, showing the which sectors are efficient with their use of energy (like the industrial sector), to those that are prolific wasters (transportation is the worst, with electrical generation not far behind). So whenever someone claims you'd solve the U.S.'s problem with importing oil by banning plastic bags, this chart can show that plastics aren't anything but a blip. Can we get some more efficient cars already? Why do we use 5mpg trucks to ship products across the country instead of using the 10x more efficient rail system? Instead of shipping Hoover Dam's power all the way to Los Angeles, can we power Las Vegas instead of moving dirty coal power from hundreds of miles to the east. Can we invest a little in efficiency, instead of building coal plants hundreds of miles north of Las Vegas? Can we start using waste heat at all power plants for other industrial uses (aka co-generation)?
Sunday, April 06, 2008
Adventures in Large Format Digital Scanning: part 1
Have you ever taken a magnifying glass in a darkened room and focused the scene outside on a wall? Or just focused the sun or a bright light?
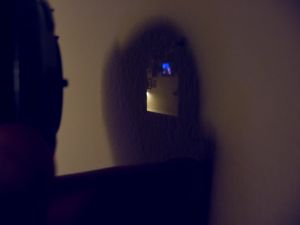
an image from a 50mm lens: the scene from the other room.
An even simpler optical system is the pinhole: Light rays are constrained in that there is one angle, and one angle only, that they can go through the pinhole, making an always in-focus optical system. There are pinhole systems everywhere: just go under a tree. All those round discs of light? Real images of the Sun. Most people don't notice until the Sun is eclipsed by the Moon, when those round discs turn into a thousand crescents.
Going back to the image formed from a real lens. Can you see if you replaced the wall with a piece of film, you've made yourself a camera? What if you put a CCD there? (That's the "film" of digital).
Now take a flatbed scanner. Those devices image just what's put right in contact with the glass on top of them. A piece of paper, a print, a film negative, etc. What if we put a flatbed scanner in the focal plane of the lens from above? If everything went right, we'd be scanning the image produced by the lens.
This is the technique used by a number of early medium format and current large format digital backs. For instance, see this Seitz scanning back or the range of scanning backs at BetterLight.
Now these are nice and all, but I don't have tens of thousands of dollars nor a 4x5 camera to stick a digital back on. So I decided to build one. This post has been sitting for quite some time with me wondering exactly how to start describing this project. My hand has been forced though, as yesterday I took my prototype outside for the first time and people starting asking questions.
So, here's an image from yesterday. Ignore the defects. The original is 1268x2552. I can quadruple that resolution at the moment, but didn't in this particular image.
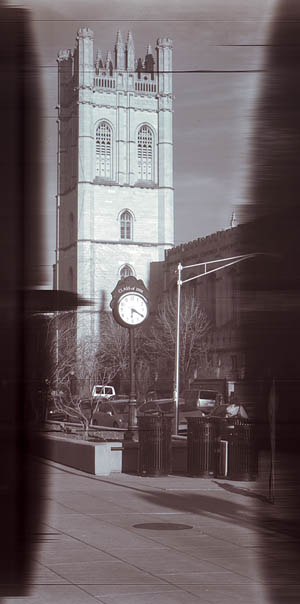
Reynolds Club at 300dpi, smallish aperture, no IR block. Slight levels adjustment, unsharp mask. Click to enlarge.

an image from a 50mm lens: the scene from the other room.
An even simpler optical system is the pinhole: Light rays are constrained in that there is one angle, and one angle only, that they can go through the pinhole, making an always in-focus optical system. There are pinhole systems everywhere: just go under a tree. All those round discs of light? Real images of the Sun. Most people don't notice until the Sun is eclipsed by the Moon, when those round discs turn into a thousand crescents.
Going back to the image formed from a real lens. Can you see if you replaced the wall with a piece of film, you've made yourself a camera? What if you put a CCD there? (That's the "film" of digital).
Now take a flatbed scanner. Those devices image just what's put right in contact with the glass on top of them. A piece of paper, a print, a film negative, etc. What if we put a flatbed scanner in the focal plane of the lens from above? If everything went right, we'd be scanning the image produced by the lens.
This is the technique used by a number of early medium format and current large format digital backs. For instance, see this Seitz scanning back or the range of scanning backs at BetterLight.
Now these are nice and all, but I don't have tens of thousands of dollars nor a 4x5 camera to stick a digital back on. So I decided to build one. This post has been sitting for quite some time with me wondering exactly how to start describing this project. My hand has been forced though, as yesterday I took my prototype outside for the first time and people starting asking questions.
So, here's an image from yesterday. Ignore the defects. The original is 1268x2552. I can quadruple that resolution at the moment, but didn't in this particular image.

Reynolds Club at 300dpi, smallish aperture, no IR block. Slight levels adjustment, unsharp mask. Click to enlarge.
Thursday, April 03, 2008
Ryerson Physical Laboratory: "Ghostly"
I originally passed over this image while taking a bunch of near infrared photos on campus. The underexposure from looking into the partially overcast sun killed all the shadow detail and the flare was a distraction; essentially I was looking at the image in the context of the shoot that day, which was finding scenes that exemplified some IR photographic ideal.
Back to the present day where I am reading up on William Henry Fox Talbot, one of the inventors of photography. His early images of Lacock Abbey are ghostly and fuzzy as he made his negatives on coated paper and made contact prints with the same process that made the positives even more dreamy and indistinct.
This makes this previous rejected image more desirable.
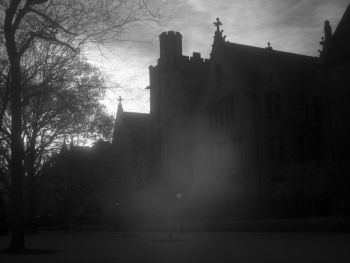
Taken on May 4th, 2005 with a Canon A95 and several layers of fully exposed color negative film as an IR filter. 10 second exposure.
Original size here.
Back to the present day where I am reading up on William Henry Fox Talbot, one of the inventors of photography. His early images of Lacock Abbey are ghostly and fuzzy as he made his negatives on coated paper and made contact prints with the same process that made the positives even more dreamy and indistinct.
This makes this previous rejected image more desirable.

Taken on May 4th, 2005 with a Canon A95 and several layers of fully exposed color negative film as an IR filter. 10 second exposure.
Original size here.
Subscribe to:
Comments (Atom)